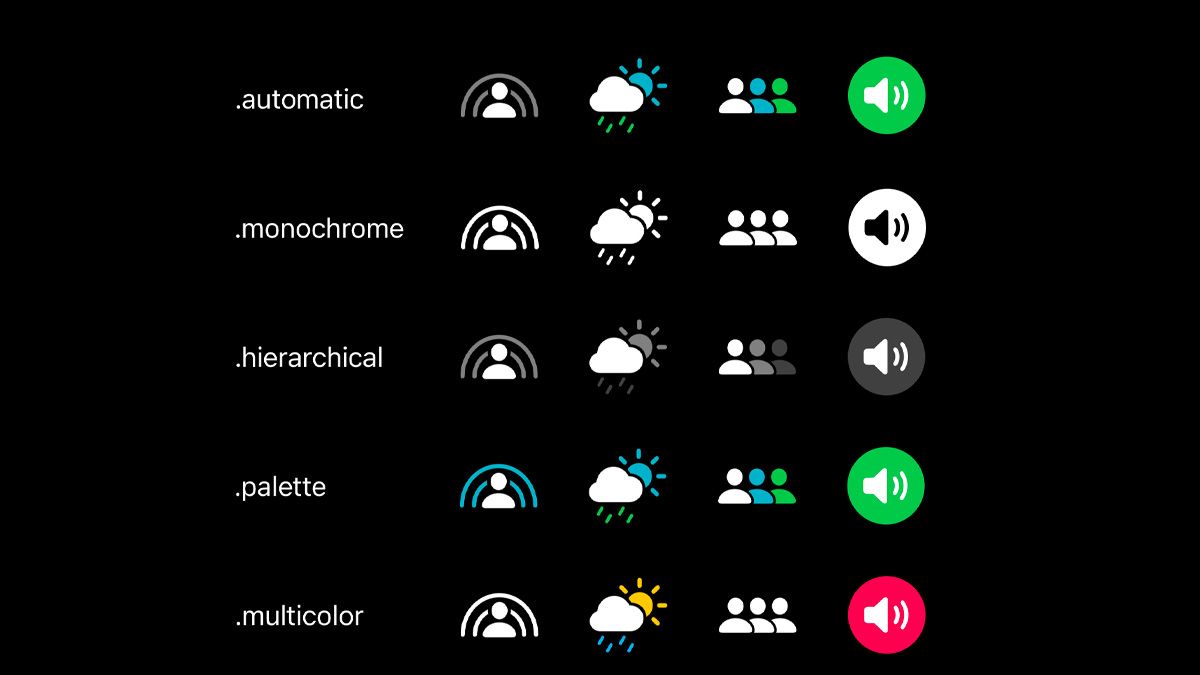
Apple allows us to customize the SFSymbols with different rendering modes. Here is a little cheatsheet explaining how to use rendering modes and how to customize them.
Automatic
This mode is used when we don't explicitly specify any rendering mode:
 Image(systemName: "shareplay")
 	.foregroundStyle(.white)
Every SFSymbol has preferred rendering mode, and when we use automatic mode each symbol will decide how to render itself.

We can also explicitly set automatic rendering mode by passing nil to the `symbolRenderingMode(_)` function:
 Image(systemName: "shareplay")
 	.symbolRenderingMode(nil)
 	.foregroundStyle(.white)
Monochrome
This mode renders SFSymbol as a flat layer filled with the foreground style:
 Image(systemName: "speaker.wave.2.circle.fill")
 	.symbolRenderingMode(.monochrome)
 	.foregroundStyle(.white)
Hierarchical
This mode renders SFSymbol as multiple layers, where each layer has a different opacity applied to the foreground style:
 Image(systemName: "person.3.sequence.fill")
 	.symbolRenderingMode(.hierarchical)
 	.foregroundStyle(.white)
Palette
This mode renders SFSymbol as multiple layers, with different foreground styles applied to the layers:
 Image(systemName: "person.3.sequence.fill")
 	.symbolRenderingMode(.palette)
 	.foregroundStyle(.white, .teal, .green)
Multicolor
In this mode supported SFSymbols are rendered as colored layers where colors are defined by the symbols themselves:
 Image(systemName: "cloud.sun.rain.fill")
 	.symbolRenderingMode(.multicolor)

This is it. If you want to know more details about SFSymbols rendering modes I recommend watching What's new in SF Symbols 4 video from WWDC 2022.
Comments
Anything interesting to share? Write a comment.